I promised this a long time ago but I was too busy to write up the details and there were a couple of things that I needed to figure out how to explain better. I think I can explain how a boomerang works to absolutely anyone. That being said I may be wrong so if there is something that you don't understand in my explanation just ask.

We'll end up talking about a lot of stuff that doesn't have to do with boomerangs just so that we have all the details we need. In fact, we'll start by talking about syringes.
So you go to a doctor and they give you a needle. The fluid in the main barrel is flowing with some speed because the nurse is pushing on the end but when it gets to the needle part what happens? Because the area of the pipe has changed the fluid must move faster to get the same amount out in the same amount of time. Maybe the diagram helps a bit.


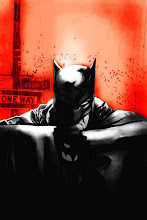
OK. Now let's talk about something seemingly completely different (and still with nothing to do with boomerangs). You're driving really fast on a highway in your Batmobile. Then you pass a semi-truck (driven by the Joker, maybe?) that is going the other way. What happens? You get sucked TOWARDS the truck not blown away from it. How come?
This has to do with Bernoulli's equation (I swear this is the only equation that we will need in order to understand boomerangs so don't get scared away, dear reader) which says that pressure plus velocity (squared) must stay constant. That means that if velocity is increased the pressure must go down and if velocity is decreased the pressure must increase to compensate and make sure that when you add them together they stay constant.
So what happened with the semi-truck? The truck and you form a short channel and just like the medicine in the syringe speeds up in the needle, as air passes between you and the truck it must speed-up too. BUT if the air speeds up that means that the pressure must go down between you and the truck (Bernoulli's equation) but the pressure on the other side of your car stays the same. That means that there is a stronger force on the other side pushing you towards the truck.

Good. Now lets talk about airplanes. Airplanes are like boomerangs, right? Forget about everything except the wing. The wing of an airplane is an aerofoil. The air that passes on the top of the wing is pushed up and has a longer path than the air below.

So the air above goes faster than the air below. That means (by Bernoulli's equation) that the pressure below the wing is bigger - there is a force pushing up on the wing! This is the lift force and it's what makes airplanes fly.

Now it's time to use our imaginations. Imagine turning a wing complete sideways . Now what happens? Well for one thing there is no force counteracting gravity and it will fall but there is a force pushing it sideways. The side ways force will make the wing go forwards and sideways. It will curve but it won't quite go turn and travel in a circular path just like a boomerang.
BUT this has a bigger problem. What? Well think of a pencil that you balance on it's tip - and you laugh at me and say, "how could I balance a pencil on it's tip. The smallest bump imaginable would cause it to fall over." Right! As it tips gravity can enact more and more torque on it since as it tips the centre of gravity moves further and further away from straight over the fulcrum (like where the pencil is touching the table).
Our imaginary turning wing is even worse. If it started to tip (as it definitely will) then not only would gravity make it tip faster and faster but also soon the lift would be pointing down more and more. Our sideways wing will flip over really fast and as soon as that happens it's not going to move in a circle anymore. It will just crash downwards. Maybe the series of diagrams illustrates it.


Here's an idea. A pencil will tip because it's unstable but what if you spin the pencil really fast? Now it's like a top. As long as a top is spinning fast enough it will be stable which has to do with angular momentum. Even though gravity pulls down on the centre of mass as it starts to tip, it doesn't fall because the angular momentum which points up from the tops principle axis changes the direction of motion and causes it to have processional motion rather than falling.
So let's spin our wing. The spinning will cause the wing to be staple and it will move in a strafing path rather than tipping.

Good try but there is another problem! The wing is travelling one way at the top of the circle and the other way at the bottom! That means at the bottom the aerofoil is facing the wrong way. How do we fix this? Cut it in half and turn one arm around and glue it back together. That way the aerofoil is pointing the right way at both the top and the bottom. This is a boomerang! The wing on the top and the wing on the bottom both have a lift force pointing

in the same direction causing the boomerang to turn to the left (that's why boomerangs can only be left or right handed - they have to be built differently for different hands). The two diagram shows how the aerofoil shape has the leading edge on opposite sides of each each arm of the boomerang.

The wing on top is traveling through the air faster than the bottom one because the boomerang is spinning and moving forward and the top wing moves with it while the bottom wing moves against the direction of motion.

So the forward moving top wing has more sideways force than the retreating bottom wing. This unequal force is what turns the boomerang so that it goes in a circular path and not just side ways. The turning force comes from the unequal air speed of the spinning wings while the spinning is able to keep it steady.

The bend in a boomerang isn't needed at all although I've read that it makes it easier to throw. That's what I know about boomerangs.
If this was too long an explanation then you should check out
avkidsBoomerang ShopIf this was too short and you were saying to yourself, "It doesn't mean anything if it's not expressed mathematically" then the websites for you would be
Unspinning the BoomerangBoomerangs.comAnd if you still aren't satisfied check out this really in depth look at
Research Support Technologies
 Next part, the plug has a holes drilled in it and these continue up into the casing. Each of thise holes has a spring in it. The spring pushes two little pins down into the plug. The top pins (which are between the spring and bottom pin) are called drivingpins and they are all the same length. They push the lower pins (called the keypins) down. These keypins are all different lengths. They rest on a little ledge called a ward. Pull your keys out of your pocket and look at one. It has that little canal that runs all the way from the tip to the handle of the key. The ward slides in the canal. The point of the ward is to be a ledge that the keypins rest on when there is no key in the keyway.
 So here is how it works. The key goes into the keyway. The notches and teeth push the pins up to exactly the right height so that each and every one of the top drivingpins is lifted (by the keypins) to the same height (exactly to the same height as the separation between the casing and the plug). This is the most important part to understand. When the key is inserted the gap between each and every keypin and drivingpin lines up with the gap between the hull casing and the plug. This separation is called the shear line. Once they are all lined up the key can turn and unlock the door. Tada! The mechanism of a tumbler lock explained!